
Showing posts with label Tim Holtz. Show all posts

Sunday, 19 January 2014

Quick knits

My mum's next door neighbour recently bought two balls of the popular frilly ribbon in the hope of teaching her granddaughter to knit but once she looked at the yarn, she realised it would be way too fiddly and she kindly passed them on to me.
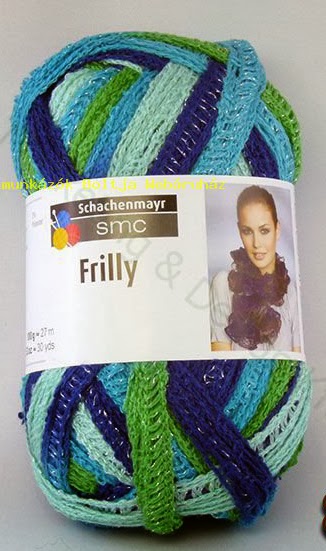


Once I'd had a look at a YouTube video (you can find instructions for anything there!), two evenings later I had two pretty frilly scarves. Anyone who's knitted with these will know that the yarn comes as a flat ribbon and you have to spread it apart as you go in order to knit it up.  It looks a bit like fishing net.  


Here's a card I made earlier which is winging it's way in the post tomorrow to a forum friend.  The butterflies are a TH on the edge die.


Monday, 6 January 2014

Happy birthday...

...to Jack my son, who is 17 today.  Where did the time go? (and where have you heard that said before?) This is not my usual style but perfectly suitable for an obsessed drummer.


The musical notes are a Memory Box Die and the image is a digital one from KennyK.  They have quite a few music/band oriented images if you need one.

Thursday, 2 January 2014

Happy New Year!

Mah Lord!  Another month has flown by.  I was busy knitting sox for a Christmas present so didn't get much time for the usual paper crafting.  Life seems to be getting busier, not quieter.  I've finally managed a couple of days off and got stuck in today.  I feel much better for having had a fix :)

I've just acquired some Heartfelt Creations dies which I fell in love with along with the matching paper pack. Here's the first card I made with them.  I was fascinated by the Sweet Juliet die The flower "petals" can be brought into the middle of the flower and fastened with a brad to create a 3d shape.


The next two cards were inspired by Hels Sheridan and have been sitting on my craft table for ages.  I tell you what - cat food boxes do make great backgrounds for mixed media work.


I have used a mixture of Fresco Paints, stencils, Treasure Gold, Tim Holtz and Heartfelt Creations dies.


The filigree flower above is also brushed with Treasure Gold (White Fire I think).  My local Dunelm is selling filigree flowers at an absolute knock down bargain price at the moment so if you have one nearby and like them, definitely worth a visit.  If you want to see the detail, as usual just click on the picture.

I was really surprised to discover today that I've had my blog since 2007.  I thought it was more like 3 or 4 years not nearly 7!!!

Happy New Year!  Hope it's a very happy and creative one x

Sunday, 1 December 2013

Getting too close to Christmas....

Can't believe it's been a month since I blogged.  I find it really difficult to create during the winter evenings. The colour is never quite right even though I have my trusty Ottlite. Does anyone else have the same problem?

I decided to make some Christmas cards this year as I really loved the Tim Holz Framelits Tree Blueprint set so.... quite a few cards later....


I used a couple of Kaisercraft and Crafty Individuals paper pads that I had in my stash  as my background papers as well as some of my own inky backgrounds, again from my stash.


I like making variations on a theme and find it fun to see how you can change the look of your card by changing the paper and layout.


It also stops you getting bored if you're using the same stamp set over and over again! The pictures look better if you click on them to enlarge.


Sunday, 3 November 2013

Birthday cards

I've been playing with the TH stamps and dies again.  The background paper is from the Laboratorie pad. As I live not far from GCHQ  and it's a huge employer in the area, I have quite a few male friends who work there. These stamps combined with the paper pad will make great cards for these guys.


This second card is a very clean style for me.  As you can see I've used the TH window die again and if you enlarge the pic, you can see a couple of Memory Box dies which I've used to fill the window box.  The background picture is from a small pad of paintings and matching coloured card that I have by Michael Powell


Sunday, 27 October 2013

Knit, stitch, (die)cut

Wow - this must be my longest time without a post.  There's lots going on at home at the moment and I haven't really managed to get my head round crafting recently.  Anyway - I've got a few things to show.  

It's that sock time of year and I recently ordered some sock wool over the internet and it came flat packed....


literally.... What a brilliant way to keep down postage costs.  One snip of the scissors and the balls of wool jumped right back into shape.


The qualified stitchers will probably look at this slightly aghast as I can see some awful errors here but I had such fun making this illuminated letter from a pattern by Angie Hughes.  It's certainly a good way to learn some new machine embroidery techniques.  You can see and buy the available workshop downloads here


And finally, it's a very popular time of year for crafting is Hallowe'en so to get myself going again I've made this tag using Tim's dies and stamps. I've also entered it for this month's Countryview Challenge.


Sunday, 15 September 2013

TH blueprints

I've become absolutely hooked on the TH blueprint stamps and now have my first set. (note "first" set)    My sister in law has one of those big birthday's coming up next week so this is for her (without reminding her of her age!)


I painted the cupcake image and candle with watercolour paints and to add some highlights, I added some blue glitter. The blue matt is stamped with the 3 other stamps that come in the same set and embossed in white.  (click for a close up).


Do you know, the most difficult part of this card was lining up that tiny orange mat.

Sunday, 1 September 2013

Twinkly stuff

Just recently I bought some Sparkle Medium from Imagination Crafts.  It looked gorgeous put through stencils on their stand and it certainly lived up to it when I had a go at home. I used 2 different colours of Sparkle Medium put through their bay leaf stencil.  It gives a lovely two-tone effect.


Wednesday, 17 July 2013

PaperArtsy Guest Designer Week 3, part 3

My final project this week over on the PA Blog uses a box frame, to feature the main image who has her own hand made earrings. Hop over and have a look if you want to know how it's done.


Sunday, 23 June 2013

Use up your left overs.....

I've been on a roll this afternoon and ended up making some cards completely unexpectedly.  What set me off was seeing the cards made by Kay here where she swiped Distress Ink across an acrylic block, spritzed with some water and stamped.  Had to have a go as this seemed very quick and easy.


All the embellishments are from my left overs box.  The die above is from Memory Box.


In fact, most of the embellishments are probably things I tried out having been inspired by other folks' blogs.
.

which then got added to the pile "for use at a later date."


The dies in the two cards above are from Tim Holtz, cut out from my inky backgrounds and you can never have enough rub ons IMHO.


If you love the metal flowers, you can find the tutorials here courtesy of lovely Linda Brown


So go use up your left overs!

Monday, 17 June 2013

Paper Artsy Guest Designer Week 2, part 2

Tonight over on the PaperArtsy blog you can see the tags that I made to go inside the book cover that I showed last night.


Lots of different things to try.


And a lovely book of tags and techniques at the end of it.


Wednesday, 15 May 2013

Key Spool

More inspiration over on the PaperArtsy blog this week from France Papillon who made these gorgeous little key spools.If you're tempted, there's a YouTube video here.  I must admit I couldn't find a wooden spool small enough so mine's a bit of a monster lol but it still turned out okay.


I used the TH dream stamp round the middle of the spool and my shrink plastic stamp is also dream related. Didn't have any clear shrink plastic but white worked well and I put some gold Krylon (like liquid gold leafing) round the edges.  I also put some Krylon round the edge of the spool to lift it.  

Monday, 1 April 2013

Just playing..

It's still feezing here so I'm quite happy to hibernate with my craft stuff.  My Hobbycraft had some Tim Holtz dies on sale (yes really!) So I snapped up a couple including the hanging sign.  I couldn't find it any cheaper - even on the internet.


 The tag is was cut out from one of my inky backgrounds.  I put Golden's Micaceous Iron Oxide through the leaf stencil (similar to Viva Ferro).


Here's a close up on the flower. The leaves are Memory box covered in platinum UTEE.  The seam binding was dyed to match. The flower was cut from a thick felt with a Spellbinders die. I also lightly brushed the leaf  with Versamark and embossed it with some platinum UTEE as well as running the UTEE round the edges.


Thursday, 21 March 2013

Card for a friend

I made this card for a friend who's birthday was earlier this week. I put this together using one of my ink sprayed backgrounds and probably for the first time, a couple of digistamps.  They are old Club Scrap ones but I realised I've got more in the same set in my stash and must use them  again.  You wouldn't actually know that they aren't stamps on first look.


Monday, 18 March 2013

Follow your (He)art

I really enjoyed making this tag... it just came together.  It's a slightly strange colour combo, not one I would normally use and I'm not sure it would be everyone's thing but as the sentiment says "always follow your ART."  The actual stamp is an Andy Skinner and it should say "always follow your HEart" so I cut off the "h" and "e" and now I have a stamp I like much better lol.  I'm also entering for this week's Simon Says Stamp and Show Challenge which is Water as there was a lot of spraying and spritzing in creating the backgrounds.


Here's a close up of the flower.  Not sure why it looks so blue...


Saturday, 16 March 2013

Variations on a Daisy

Two creations using the same stencil which I've been experimenting with a lot recently, spreading different media through it.  I used Distress Crackle Rock Candy courtesy of Hels on her C&C demo the other day.  Once the rock candy had dried I used a paint brush to flood the crackles with ink to colour it.  


I used Golden light moulding paste for the hanging and then coloured the whole thing with Fresco acrylic paints.  The centre of the flower is one of the TH tattered florals, die cut, embossed with some Ten Seconds Studio tools and coloured with alcohol ink.


Sunday, 27 January 2013

Sunday Stamper - Wish

I've had one of those lovely afternoon's where it's all just flowed... happy sigh....  Hence my third post in one day!  I've been enjoying Hels Sheridan's lovely creations recently so here's mine for this week's Sunday Stamper.   I just couldn't decide which colour background to photograph it on, so I chose all of them...


Then I had another thought.... what about a different flower?


Sorry the photographs aren't perfect - roll on lighter evenings.  You can click the pic for a clearer view.

Glitter and Glue

Last time I played with my Flitter Glu (Indigoblu) and gilding flakes, I just couldn't get it right but this time the results are better and I'm pleased with the finished images.  This image is called Ella Bella.  The  flower is made with one of my spray ink backgrounds, using the TH Tattered Florals and Pine Cone die. 


(This was made using wax paper in the centre of the flower). The ripped note book edges are a Spellbinders die and the film strip is TH.

Much as I love these dimensional cards, they are such a pain to post.  You really need a box and it does increase the postage cost by quite a lot.  I'm curious if anyone has a solution to this - other than not sending dimensional cards! lol

I managed a photo in the garden - its so nice to have some blue sky and the temperature a few degrees higher!

Sunday, 28 October 2012

Here comes Hallowe'en

Having whinged for years how much I dislike Hallowe'en, I'm now really enjoying all the ghoully, creepy,scary side of it.  I think it's the children knocking at my door that I really can't cope with! Now is a great time to stock up on your cheap skeletons and anatomical parts as they are available, mass produced and cheap.

It's been really difficult to get good photos because it's very dull and the lower half is quite dark.

The skeleton is from a pack from the local pound store, the dies a mixture of Spellbinder and Cuttlebug, papers from a pad by My Mind's Eye, spray dyed seam binding, the embossing powder (which I love) on the metal label is an ancient one from Judikins, crow and word stamp also My Mind's Eye.


A close up of the top of the tag..


... and the lower half


I've also entered it into a couple of challenges Fashionable Stamping (Hallowe'en) and Anything but a Card (incorporate black into your project)

I almost forgot..... this is for Karen(!)


Sunday, 14 October 2012

Enjoy the Journey

I've been playing with this project for a while and finally finished it. The idea came from this video  on YouTube.  If you've never come across Laura and Following the Paper Trail and want a book template, she has a huge amount of projects and mini books on YouTube and can often be found broadcasting live on UStream.  The book pages are basically made from envelopes so you can put inserts (tags, mini-books etc) inside the envelopes which are open at the ends. I used basic bookbinding techniques and mat board for the cover.


To avoid a picture heavy post, I've spent the day playing with Windows Live Movie Maker for the first time and I recommend it if you've never tried it before.  I've had great fun.  Interestingly, I lost some clarity uploading into Blogger so it's not as high definition as I would like it to be but it's all a learning curve!


I used some gorgeous double sided Paper Artsy papers which I've had in my stash for ages.  I'm not actually sure if they're still available but they are a good weight and it takes the stress out of trying to match everything.  Now I just need to arrange a trip somewhere so I can fill it with photos and journalling :)