Showing posts with label Fresco acrylic paints. Show all posts

Saturday, 15 February 2014

PaperArtsy Chatsworth Paper Collection

So anyone who follows the PaperArtsy blog will now know that they have (hooray) released some new papers.  I loved their Thorndon papers which are now sadly discontinued.  They were such good quality and these are certainly on a par. They go beautifully, not only with Lin Brown's range of stencils, stamps and new Fresco Limited edition paints but also the rest of the PA range.

Once again, I've been so lucky to have a play. I can HIGHLY recommend them.

The set of ATCs below uses a combination  of PaperArtsy stencils (old and new) and I used one of the many PA script stamps on the paper as background.  You can see that this paper echoes the diamond stencil.


The paper below echoes one of Lin's new stencils


I used Lin's ELB04  plate and the new Fresco colours to stamp up some flowers on black card and used on of the quotes from ELB05 as well as some lace from my stash.


Friday, 14 February 2014

Eclectica³ Lin Brown Collection - more

Another piece from me using Lin's new Fresco paint colours, and stamps including the new quote stamps which you can see here

Wednesday, 12 February 2014

PaperArtsy Reveal - Eclectica³ Lin Brown Collection

More excitement over at PaperArtsy tonight as the next new products come on line and tonight it's Lin Brown's turn.  Lin's collection with PA just keeps growing and now stencils and new Fresco paint colours have been added to the list as well as more beautiful new stamp plates. Lin now has 2 "quote" plates which work really well with the rest of the line. 


Again, I've had a wonderful time playing with the new products.
Here are a couple of ideas for you.

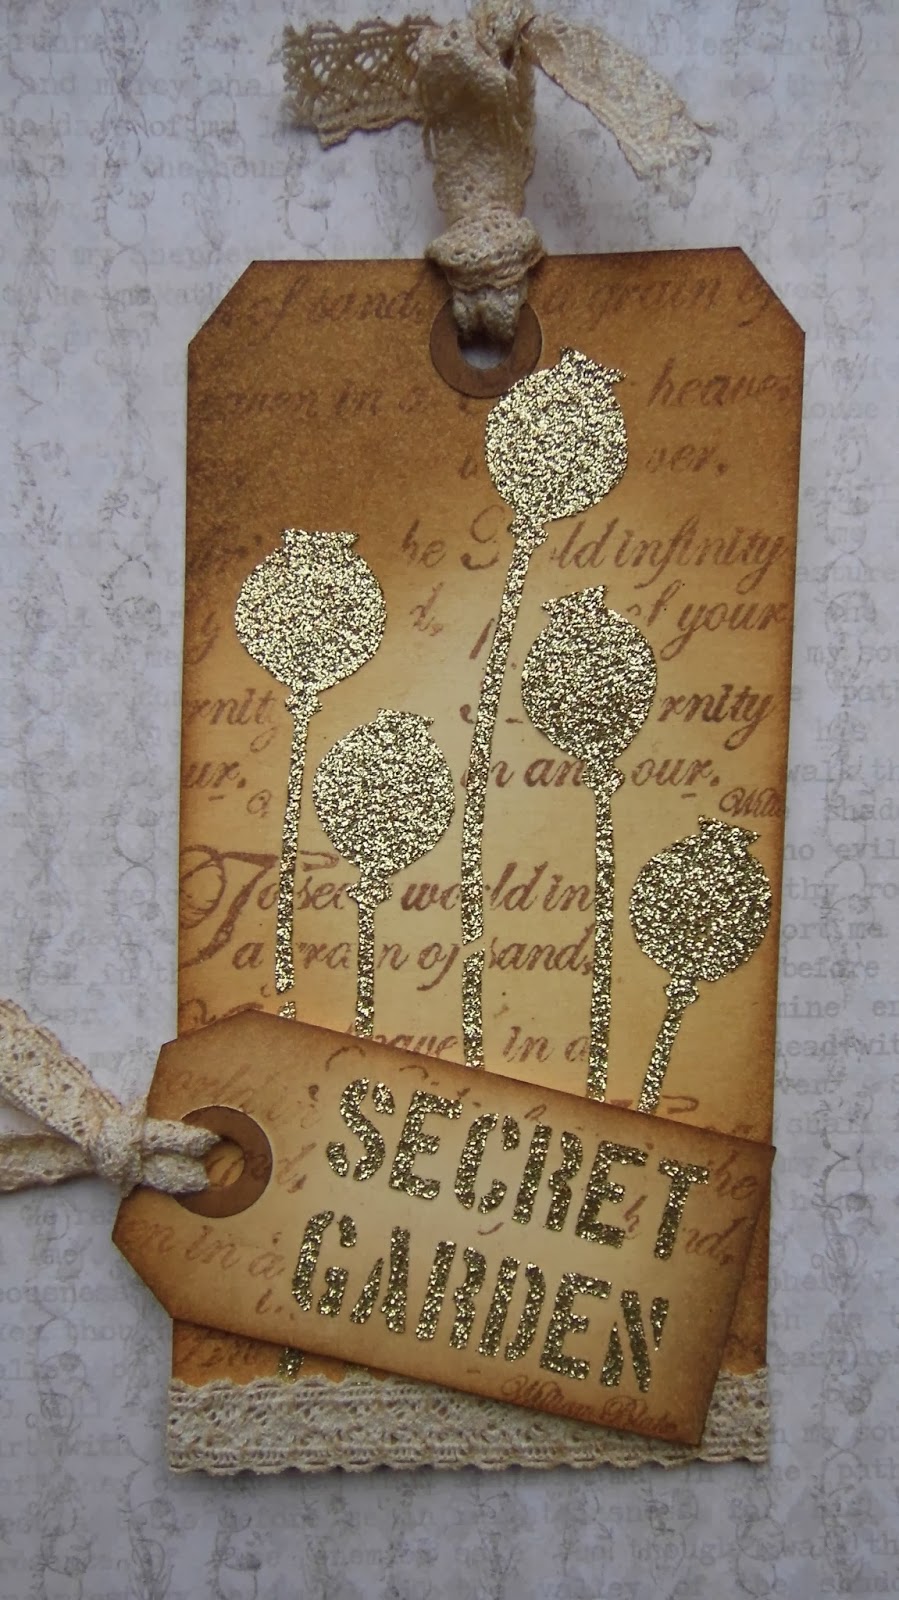
The tag below was made before I'd even thought about it really.  I just picked up the closest craft items to hand and it was done before I knew it! 


The background is coloured with distress inks and overstamped with a quote stamp from ELB05. 

I then used one of the new stencils.


.... and pushed embossing paste through it, before covering it liberally with gold glitter.

The wall hanging below used greyboard as the substrate.  


I used Lin's new Fresco colours throughout...


aren't they yummy! I also used another new stencil with PA Grunge Paste.


Highlights were added with White Fire Treasure Gold 


Hope you like my....


If you go over to Lin's blog, there are lots more samples and ideas for you there and also over at Jo Myhill's blog.

Sunday, 9 February 2014

PaperArtsy Reveal - Eclectica³ Darcy Collection Part 2

Before you see the second group of samples I created for Darcy's big reveal, I thought you would like to see the new plates that are available.


Aren't they just fab?!  

Darcy has created some really useful stamps for backgrounds and filling.  The No 10 tag below was coloured with Fresco paints and a tiny star stamp used to highlight the background for the top half of the tag.


The butterfly has also been painted with Fresco paints and the lower wings highlighted with a white marker.


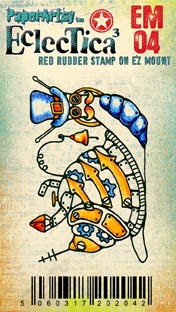
My final mixed media piece below was made using the images from EDY05, EDY06, EDY07 and EMO4.

The background was put together on corrugated card using Grunge Paste for texture.  I painted it with a mixture of Claret, Tinned Peas, Hey Pesto, Green Olives, Cheesecake and Haystack.  I stamped the grass/flower stamp and embossed with black embossing powder.  I intentionally didn't worry about having a complete image.  I used the little mixed circles stamp from EDY06 and Claret Fresco for added interest and finally highlighted with White Fire Treasure Gold.


I painted a couple of pieces of Smoothy Card separately with Fresco Claret and Tinned Peas, stamped the flamingo image and then cut out different sections of the claret flamingo and stuck them onto the tinned peas flamingo.  Probably unnecessarily time consuming (!) but it did give more depth lol.  


I then did the same with the caterpilllar.  


The "sun" flower is a stamp from EDY05.  It was stamped onto painted card and cut out twice and layered up.I punched out the edge holes for  extra interest.
  

I hope you've enjoyed seeing all the wonderful creations from the team. Watch this space as there is more to come!!! (see the link on my previous post)

Saturday, 8 February 2014

PaperArtsy - The Reveal - Eclectica³ Darcy Collection Part 1

It's been creative madness over at PAHQ the last few months and the tension has reached fever pitch over the last couple of weeks with all the new products about to be launched.  PaperArtsy are going to be on fire this year!

So here we go........ Darcy's new stamps.  If you haven't already been over to the PaperArtsy blog for the big reveal it's here.  There are 4 new A5 plates and 8 minis.

Darcy has a fabulous line of quirky stamps which are such fun to play with. It was very exciting when the postman arrived with the delivery of the new stamps.

I started off quite simply with some kraft card and my colouring pencils.  You can see there's quite a steampunk element to the stamps (EDY08) as well.


Next, using three of the new minis as my main images I created some ATCs using Smoothy Card. (perfect surface for applying inks and paints).  Each image (EM01,EM03,EM07) was stamped onto the ATC. I then created a mask for each image, placed it on the card and coloured the background with distress inks.  The mask could then be removed and the images were coloured with Fresco paints. I purposely made the mask slightly larger than the stamped image so that a white border was left to highlight the image. Finally I stamped round the edges of the ATC and added the word stamp.


PaperArtsy have recently introduced some new colours to the range. If you haven't come across Fresco Finish Chalk Acrylic paints before, there are now 64 gorgeous colours in the range in a mixture of opaque, semi-opaque and translucent. They dry matt and are very easy to  use.  One of the great advantages from my point of view is that they can be stamped on without losing clarity of your image. There is a  great YouTube tutorial by Leandra here which helps explain how the paints work together.  

This is a size No 8 tag.  I used one of the minis for my main focal here.  This little bird is so cute and the words work beautifully alongside.


I think the birdcage (EDY07) is one of my favourite stamps from the collection.  The plaque below was made using greyboard, again painted with Fresco paints.  The hanger (EDY07) for the birdcage is actually part of another stamp which I (gulp) decided to cut in half because this fit my purpose better.  It's still possible to use it as it was meant to be once the two parts are stuck back together on an acrylic block.


To add interest to the background, I stamped another small background stamp from EDY07 using clear embossing powder.


The birdcage itself I coloured with gold Krylon and to create the glass effect I used Ranger Glossy Accents. A flourish stamp (EDY07) was stamped round the edge with gold UTEE


I used glossy accents again on the the heart stamp (EDY06)


I broke up the word quote as I didn't have room for all of it and it still works just as well.


All Darcy's new stamps will be available via your local stamp store in the coming weeks for PaperArtsy Trade customers to order. Initially shops will be able to order direct from PaperArtsy next week online (wholesale website only) or in person at the Craft Hobby and Stitch International Trade Show, NEC Birmingham, Feb 16-18. PaperArtsy is stand A42, situated as usual in the back left hand corner of the main hall, with a handy coffee cart nearby.  Shipping of all new products starts immediately after the trade show ends: Wednesday Feb 19th, 2014.


I hope you've enjoyed my creations with Darcy's new stamps. The rest of the DT have been busy too and you can see more delights here, here and here.More tomorrow night.

Thursday, 2 January 2014

Happy New Year!

Mah Lord!  Another month has flown by.  I was busy knitting sox for a Christmas present so didn't get much time for the usual paper crafting.  Life seems to be getting busier, not quieter.  I've finally managed a couple of days off and got stuck in today.  I feel much better for having had a fix :)

I've just acquired some Heartfelt Creations dies which I fell in love with along with the matching paper pack. Here's the first card I made with them.  I was fascinated by the Sweet Juliet die The flower "petals" can be brought into the middle of the flower and fastened with a brad to create a 3d shape.


The next two cards were inspired by Hels Sheridan and have been sitting on my craft table for ages.  I tell you what - cat food boxes do make great backgrounds for mixed media work.


I have used a mixture of Fresco Paints, stencils, Treasure Gold, Tim Holtz and Heartfelt Creations dies.


The filigree flower above is also brushed with Treasure Gold (White Fire I think).  My local Dunelm is selling filigree flowers at an absolute knock down bargain price at the moment so if you have one nearby and like them, definitely worth a visit.  If you want to see the detail, as usual just click on the picture.

I was really surprised to discover today that I've had my blog since 2007.  I thought it was more like 3 or 4 years not nearly 7!!!

Happy New Year!  Hope it's a very happy and creative one x

Monday, 2 December 2013

I didn't plan this...

I've had the day off today (yay!)  and was looking round for creative inspiration when I remembered Jo Myhill's home decor canvas on the PaperArtsy blog.  I won't go into the detail as you can see the instructions if you click on the link but I've spent a very happy time mucking around with paint, Grunge paste, distress glitter and Treasure Gold etc.  My canvas was an old project I had started which was blue in colour with some stencil embossing round the edges. It didn't take long to cover it up with the Fresco paints. I didn't have any Liquid Leaf in the right shade so hence the Treasure Gold in White Fire instead. 

I  had to use a wooden heart as I didn't have a papier mache shape. I also added some sparkle to the background with Stampendous Frantage Shaved Ice.  The flourish was embossed onto the heart with gold UTEE which you can also see if you look closely at the texture on the canvas. 

I'm really pleased with the result

I'm also entering it for Simon Says Stamp's Monday Challenge which is "With a Flourish"  (although it is inspired by Jo Myhill!)


Here's a close up of the texture.  You can just see the stencil embossing from my previous project and I like the extra depth it added to the layers.


Wednesday, 21 August 2013

Happy 10th Birthday Paper Artsy

OMG tonight of all  nights, my PC dies and I've had to resort to scrounging my son's laptop.  Anyway.......

For my final, final project, I was given the opportunity to work with Lin Brown's new plate of stamps.  I've been practising my drawing skills recently and needed a pot to keep all my pens in.  This was the result. Cute Huh???  If you would like to know how to make it hop over to the PA blog here


So,  I'm sure you've all been waiting for a chance to post to win one of the two sets of Lin's stamps that Leandra has kindly given me to offer as prizes.  Just leave a comment below and I'll do a random draw in one week's time.

As I've also said on the PA blog, thanks to everyone for their lovely comments.  It's really meant a lot to me and so has seeing my work being reproduced and inspiring people.

Good luck in the draw!

PaperArtsy Guest Designer Week 4 Part 3

You'll need your sewing machine for this project. Lin Brown's lovely Eclectica stamps were originally designed to be used on fabric and there's no doubt they work brilliantly if you do decide to have a go.


This has to have been my favourite project.  I loved every minute of making it.  As I went so mad making the painted flowers, there were many left over and they look just as good made into fabric tags.


If you want to know how, here's the link.

Technically this was supposed to have been my last project for PaperArtsy but as it's their 10th birthday this month there have been all sorts of special posts and prizes. So my final post is tonight and I can only say if you are a fan of PaperArtsy or would like to start adding their products to your collection, come back tonight for a surprise.

PaperArtsy Guest Designer Week 4 Part 2

I've not been around the past couple of days and completely forgot to schedule my PA posts. My second project this week tries to explain how to end up with a creation that hangs together and not look like the elements have been "plonked" onto your substrate without any cohesion.  If you want more info hop over here


Sunday, 18 August 2013

PaperArtsy Guest Designer Week 4 Part 1

I'm back on PaperArtsy today for my final week as part of the guest designer team.  Just by chance it's PaperArtsy's 10th anniversary this month so there lots of extra happenings and giveaways on the blog as well as specials over on the shop website.  Don't miss Monster Monday if you're a fan of PA products.  Bargains to be had every Monday evening and they sell out very fast.

My first offering is an extension of a project I did last month, the shrink plastic bracelet which you can see here.  I thought it would be fun to have a box to keep it in.


If you want to see the full instructions, hop over to the PA blog here.